
With dimensions of 85mm x 44mm x 28.4mm, the SMOK Alien 220W Mod is a compact, portable for a box mod that puts out a massive 220W. The UK SMOK vape kit enables you to personalise your own SMOK Alien Mod Kit by using your favourite tank. Integrating futuristic elements, the fully safe SMOK Alien mod implements a soft contour around the superior zinc alloy chassis with colorful inlays. The chipset is distinctly intelligent, providing a wattage range of 6-220W, minimum atomizer resistance of 0.06 ohm, and full temperature control-suite with support for Ni200, Titanium, and Stainless Steel heating elements.

SMOK SMOK Alien Mod reviews
Video Transcript: SMOK Alien Kit 220w TC Mod Review by Zophie Vapes
Hey, what's up, everyone. I am Zophie. And today for review, I have the SMOK Alien kit. So this comes with the mod which goes up to 220 watts, it's jam-packed with power. Of course, it does temperature control, stainless steel, nickel, and titanium, and it comes with the Baby Beast. And this thing will come with two different coils, there's a 0.15 ohm and a 0.4 ohm. Right now, I'm using the 0.4 ohm at 55 watts. So the Baby Beast, I'm not gonna go into too much detail because I have already done a review on it. And if you wanna check that out, the link will be down below the video. So next, let's check out this kit.
Here, I have the SMOK Alien kit, this is how it will come packaged. On the back of the box, it'll give you the kit contents, specifications, a little intro about this kit, and on the side is a scratch of authenticity code. Inside of the box is a quality control pass which is also the warranty card, and on the back of that, it shows you how to verify the product's authenticity. There's also a battery safety card, a user manual, a USB cable for firmware upgrades and for charging, a couple of protective bands for the tank, a little spare parts bag with extra seals, a spare glass tube, two coils, one of them will already be pre-installed inside of the tank, mine came with this one. This is a 0.4-ohm coil that can be vaped between 40 and 80 watts. However, they're recommending to vape it between 55 and 65.
The other coil is the T8, the Baby-T8. Here's what it looks like on the inside. This is a 0.15-ohm coil, and it can be vaped between 50 and 110 watts. However, they're recommending to vape it between 60 and 80. This kit will also come with a Baby Beast tank. Here's the bottom of the 510 connection pin, this protrudes a little tiny bit and it is not adjustable. On the bottom, you'll notice a couple of air flow slits, this is adjustable by turning the air flow control ring, which is on the stopper. The drip tip is removable, it is a 510 drip tip, so you can use your own. The Baby Beast is a top filling tank, you will notice there's a little arrow here, and it says Open. This actually has a swivel design, so all you do is swivel this to the side and then you would pour your liquid down that hole right there. To take this apart, you can twist off the base, the glass just pops out like this.
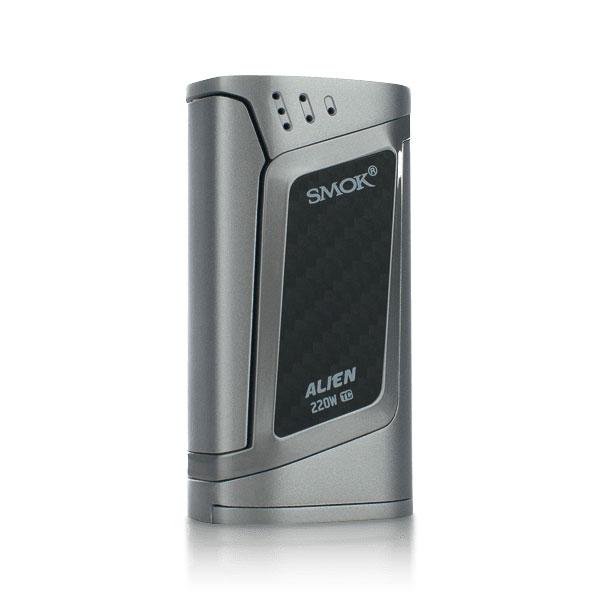
And if you wanna replace the coil, this just twists out. And you can install another one. And finally, here is the main attraction, the SMOK Alien mod, it goes up to 220 watts. At the top is a 510 spring-loaded connection. Towards the top right here, you can see some holes that is for battery ventilation. On this side with the glossy part, that is the OLED screen, it is huge. These are the plus and minus buttons and the USB port. And on the other side of this, it'll say SMOK Alien 220W mod. Of course, it does have temperature control. And this kind of has like a neat like 3D-ish look to it, that's kind of cool.
This right here, this is the fire button. On the bottom of the mod is the battery cover and that just slides out like this, and then you lift it up. This holds two 18650 batteries which are not included. So if you guys are wondering where I get my batteries or what my favorite one is, I do tend to favor Sony VTC5s, which is what this is, and I get them from imrbatteries.com. So to stick the batteries in, and the manual also does have instructions, this side is negative facing up and this side is positive facing up. And then to close this, you just push this down and slide it in.
To turn the mod on, click the fire button five times. Once this is on, you can see the OLED screen is just massive. So over here, it'll show your wattage or temperature, whichever mode that you're in, there's voltage, there's ohms, there's amps, there's a puff counter, PCB, that is the temperature of the board inside, and there's also the mode that I'm currently in, which is wattage mode. Before I go into the menu, let me show you guys some shortcuts. So to lock the mod click the fire button, five times and that'll lock it. Once it's locked, you can turn it off, just by holding the fire button for about five seconds until you get this screen, and this is how you can turn it off.
If you hit this button and the fire button at the same time... Here, you can switch between wattage mode, temperature control, and memory mode. If you hit this button and the fire button at the same time, you can adjust your vaping strength. And if you hit these two buttons at the same time, you can lock and unlock the mod. To go into the menu, click the fire button three times. First option is Mode. Here, you can switch between wattage mode, temperature control, and memory mode. Let's go into wattage mode first. Once you click on that, you can adjust your vaping strength, there's hard, soft, and normal. Let's check out temperature control mode next. Next option on here, you can either wait or click the fire button, you can adjust the wattage in temperature control mode. Next option, you can pick the type of wire that you're using, there's stainless steel, there's nickel, and titanium. And after that, you can adjust the temperature coefficient of resistance. And the last one is memory mode. So if you go into here, you can select your vaping strength again. And here there's already preset settings in memory mode. However, each one of these you can adjust to whatever you want. And there's a bunch of these settings.
I believe there's 22, and all of them can be adjusted to whatever you want. Next one over in the menu is the puff counter, you can set a maximum amount of puffs, Never is infinite. It will show you how many puffs, you've already taken. And the next screen is just a puff reset. Next one over in the menu is settings, so if you click on that, this is Stealth mode, you can turn off the OLED screen, but everything will still function. Screen time, this is the amount of time before the screen goes dark and you can adjust that back in settings. Next one over, this is the auto lock, you can leave it on or off. Back in settings, third one over, this is Screen Contrast. So after Screen Contrast, you can set your resistance.
And the last one, this is for firmware upgrades, you will connect this to your computer. Click yes, and then you can upgrade the device. And the final option in the menu, this is the long way to turn the mod off, power on or power off. In Wattage mode, this will fire as low as 6 watts and then you can go up in increments of 0.1. However, if you hold down the button, it will do this a lot faster in increments of 1 watt, and it'll go all the way up to 220 watts. And the lowest resistance, this will fire in the wattage mode is 0.1-3 ohms.
So, in temperature control, this will fire as low as 0.06-3 ohms. And it'll fire as low as 200 degrees Fahrenheit then it goes up and down in increments of 10 degrees. If you hold the button down, it will do this a lot faster all the way up to 600 degrees Fahrenheit. And then you saw it switch to Celsius. So after 600 it does switch to Celsius and then you can go up and down in increments of 5 degrees, all the way up to 315 degree Celsius and then it'll switch back to Fahrenheit.
Alrighty, guys. So I am back and I went over all the specs that I wanted to tell you guys, so I'm just gonna jump right into pros and cons. Let's start off with the negative. Honestly? Honestly, I didn't find that many things wrong with it. As long as you get one with the firmware upgrade, which mine does have, no issues. I think some of the pre-released ones, there was some issues but it is fixed now. And like I said, I've been using this for three weeks, no issues, no misfires, everything, temperature control, wattage mode, everything is working perfectly.
So cons. Cons. Now, if you put a on here, that's like 25 millimeters, there will be like a tiny, tiny, itty-bitty, a little hang over. Maybe not even a millimeter, so it's barely noticeable. So for that, I guess I'm gonna give it one con. And then the other thing is, I know some of you are not gonna like the fire button. Now, it's not the whole thing that you push. It really starts from about here up. And that's how you fire it. Now, when I'm clicking it, it's kinda loud. You can hear it's really loud. And when I touch it, it feels really loose. However, when I shake it, there's no rattle to it. So I guess I could give it a con for that, but it really isn't.
So pros. This thing definitely has more pros than it has cons. First of all, loving the matching-matchy O-rings. Whatever color you end up getting, the O-rings do match the rest of the mod, so that's cool. And as I mentioned before, this thing goes up to 220 watts. Of course, it is temperature control, as well. I have used it on both and it's working just fine in either wattage or temperature control mode. And I... I don't know who needs 220 watts, but I know you're out there, and I don't know how you do it, I don't know why you would need that much power, but if you do, this definitely comes with it. Another thing I really like about it is that you can adjust the wattage in temperature control mode. Pretty much as soon as you have it set on temperature control, the next option after that will be to adjust the wattage. So that, I definitely have to give it a pro. This mod is also pretty light for a 220 watt mod. It doesn't have much weight to it. I mean, of course, once you stick the batteries in there, it will be a little bit heavier, but it's still a lightweight mod.
Another pro with this kit. Well, it is a kit, so you get the mod, you get the Baby Beast tank, which comes with two coils, comes with replacement glass. You also get a USB charge cable, and I don't recommend using it for charging. I do always recommend using an external charger. I think it's a lot better and quicker. But you can use that cable for firmware upgrades, so that is another pro. It is firmware upgrade-able. So that's pretty much it. Now the tank, like I said, I have a whole video about that. If you wanna check that out, the link will be down below the video.
Overall, I will say, I do like the T8 coil better, the 0.15 ohm coil. I think I get a lot more flavor out of it and less spit back. Now with the 0.4 ohm coil, I am experiencing some spit back, and the flavor is not as good as with the other coil. But again, if you wanna see the full review, the link will be down below the video. So that's pretty much it. That is it, guys. I absolutely love this mod. You guys have probably seen me using it a lot in other videos or on Instagram. So the mod, I do love it. And price point, these are not that bad. Now, if you go to smoktech.com, they do sell them directly on their website. But again, they're gonna be the most expensive out of everyone at $119.99. But if you Google it... I do recommend Googling it. You can find this for around like $60-$65 for the whole kit, so not a bad price at all for what you're getting. Alrighty, guys. So that's it. That's it. That completes my review. If you kind of enjoyed what you saw, please do subscribe, or don't. And if you wanna find me elsewhere, I'm on Twitter, Instagram, and Facebook. And all of the links will be down below the video. I will talk to you guys next time. Bye.