
When it comes to repeated performance, you cannot beat the Vaporesso Tarot Nano. Thanks to its built-in OMNI board makes, the Vaporesso Tarot Nano is an intelligent device, whereas its safety features — low voltage protection, short circuit protection, low resistance protection, and a lot more — make it a no-brainer. It has a range of modes, including broad adjustment temperature control (280F-Custom Curve Wattage, Custom Curve Temperature and Bypass. The onboard VECO tank holds 2ml of juice with a top airflow system that prevents leaks and produces immense flavor. Other impressive specs include 80W/8.5v maximum and a 2500mAh built-in battery.

Vaporesso Vaporesso Tarot Nano reviews
Video Transcript: Vaporesso Tarot Nano 80W Vape Kit / Best Tiny Mod of 2016! by Zophie Vapes
Hey, guys. What's up? Today for review, I have a Vaporesso Tarot Nano kit. This can do wattage mode, temperature control, nickel, titanium, and stainless steel wire. It also has bypass.ode, which turns this into a mech mod. There's also TCR settings on here, and you can even adjust for a custom power curve, so you can adjust wattage in temperature control mode, you can even adjust the power curve in wattage mode. So I'm gonna show you guys this thing up close, all the different functions, how to use the mod, and I'm also gonna show you guys the tank. Earlier, I reviewed the Estoc tank, which actually uses the same coils, but I will say the flavor out of this tank, using the same, exact coils is a lot better.
Next, let's check out the kit. Alrighty, so here I have the Tarot Nano starter kit, this is how it will come packaged. On the side, it talks about the coils that they're using, they're called EUC Coils, Eco Universal Coils, and on the back of the box, it gives you more information about this kit. So let's open this up. So once you have this little box out, it opens like this. Inside this little box, there's one fine-looking USB cable, 0.5 ohm coil that can be vaped between 25 and 35W. This kit will actually come with two coils. This one is already used, it is a 0.4 ohm coil. It can be vaped between 40 and 50W. There's a little envelope, inside of the envelope is a warranty card, a little card that shows you the structure of the ccell Coil, the ceramic coils and the benefits to that, and this little warning card that you should probably read before using the product. On the other side of the box, there's an extra glass piece and seals for the tank, and here is the tank. This is the Veco, and it holds 2ml of e-liquid.
Here's the bottom with the contact pin. It is not adjustable, so this will definitely not work with your hybrid mods. The tank has adjustable airflow at the top, the Delrin drip tip is removable. To fill the tank with e-liquid, you just twist off the top portion, and then you dump your liquid down the sides, never into the middle. And this portion comes apart too. Here's a look at the base. So basically, part of the coil stays in there permanently. So to insert this into the tank, all you do is just pop it into this portion, or you could just plop it into here, and then stick this on here, it really doesn't matter. The coils don't twist in, you just kinda place them in there, and that's it. What's nice about this, once you have it filled up and you decide you want a different coil, all you do is twist off the base and then the coil just pops out like this.
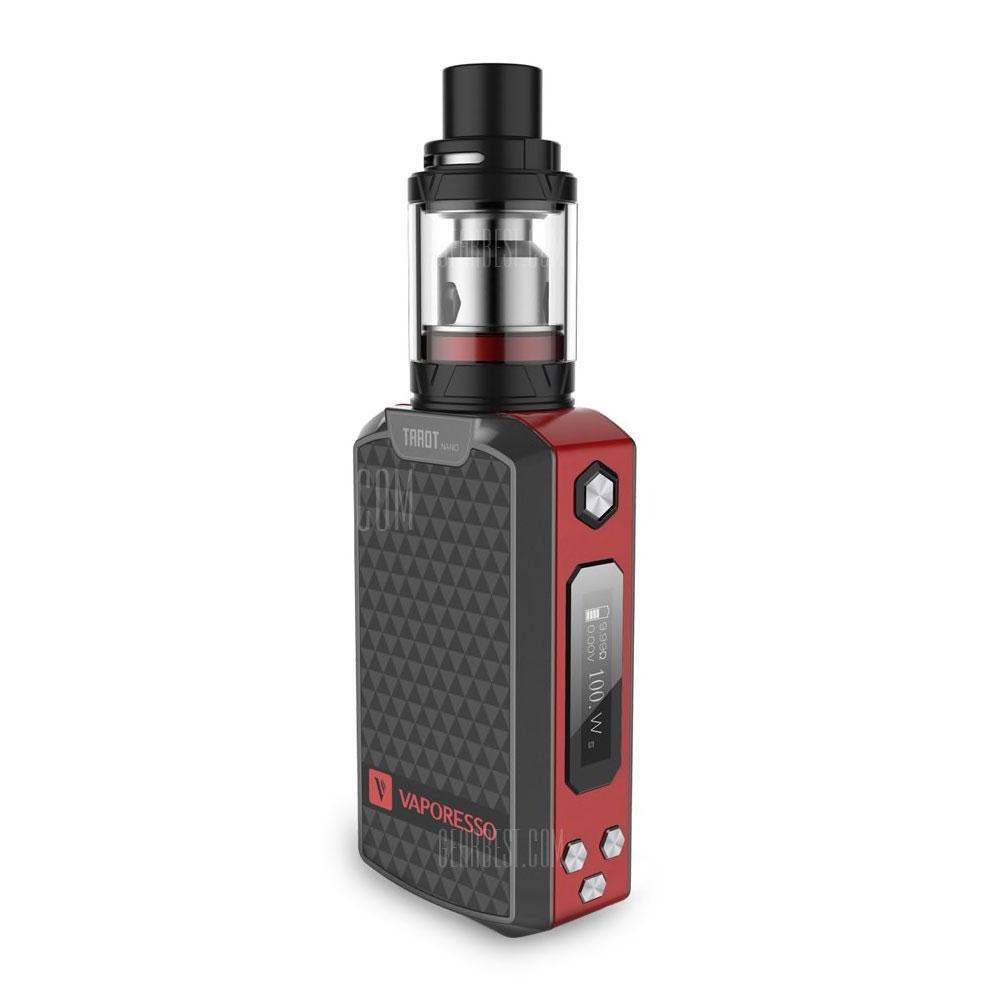
Finally, here it is, the little adorable Tarot Nano mod. Here is the USB port for firmware upgrades and for charging. At the top is a 510 spring-loaded connection. On the side is a fire button, OLED screen, nice size OLED screen for such a small mod. There's the plus and minus buttons, and a mode button. And on the bottom, you can see there's plenty of battery ventilation. Right now, this is off. To turn it on, click the fire button five times. When you first turn this on, this is what the screen will look like. Here is a battery life indicator. There's resistance. Right now, I don't have a tank on here, so it's just showing 999. There's voltage, which is down here, which will display when you're vaping, and there's wattage. So in wattage mode, this will go from 5W, then increase in increments of 0.5. If you hold down the button, it'll do this faster, all the way to 80W.
Alright. So I have this back at 5W. Now, I'm gonna put my atty back on here, the Veco tank, and then the screen will pop up like this. So it'll do this every time you put a new atomizer in here, it'll ask if it's a new load or an old load, so new coil or old coil. Click plus. And this actually has Smart Wattage Recognition, so it'll set the wattage based on the resistance of the coil, or if you don't like that, you can use the plus and minus buttons to adjust it. So that little S right there on the screen, that stands for the Smart Wattage Recognition. To lock the mod, click the plus button and the mode button at the same time. If you hit the plus and minus button at the same time, it'll flip the screen. Right now, it is in wattage mode, but if you wanna change that, hold the mode button. So now I'm in nickel wire. There's stainless steel, titanium, memory one and memory two, these are TCR settings, bypass mode, which turns this into a mechanical mod, so for advanced users only, and back to wattage.
So right now, I am in wattage mode, and I'm gonna click this mode button over here three times, and that'll pull up this screen. Click the mode button again to get you to CCW, and then hold the mode button and this will bring you to a custom curve. So you can see the little light flashing underneath the first bar, each one of these can be adjusted, so you can do a custom power curve. To do that, you just use the plus and minus buttons to adjust each line. And once you're done, click mode and it'll go to the next one. Click mode, and so on. Once you have it where you want it to be, hold the mode button. To go back to the way it was, click the mode button three times, click it again, go to VW, which is wattage mode, and hold the mode button.
So right now, I'm in temperature control mode, set for stainless steel wire, and I wanna lock in my resistance, so watch the little symbol right there. If I push the minus button and the mode button at the same time, the little symbol will change and that will indicate that the resistance is locked. In temperature control mode, you can do the same thing as in wattage mode, click the mode button three times and it'll bring you to this screen. Click mode again, and again, you can do the custom power curve. I wanna go back to the M1 and M2 settings, this is for TCR. Click the mode button three times, and here you can set your TCR settings, Temperature Coefficient of Resistance. In temperature control, this mod will fire as low as 200 degrees Fahrenheit, then it goes up and down in increments of 10 degrees. Hold the button down and do this a lot faster, all the way to 600 degrees Fahrenheit. And if you keep going, it will stop, but if you keep going, it'll switch to Celsius. So in Celsius, it goes up and down in increments of five degrees, hold the button down, it'll do is a lot faster and it'll stop at 315 degrees Celsius. And if you keep going, it'll round robin back to Fahrenheit.
Alrighty, guys. So I am back. The mod will fire down to 0.15 ohms and it will go all the way up to 5 ohms. And I probably should have mentioned in the intro, it does go up to 80W as well, so that is pretty impressive for something this adorable and itty-bitty and tiny. It's just so cute! The Veco tank. It does only hold 2ml of e-liquid, but I think they made that so it's compliant with other countries that have regulations on that, so that's probably why it's at 2ml. Other than that, the vapor production, as you can see, is pretty awesome. The flavor on here is above average. On a scale of one to 10, I would have to give it about a seven. It's a lot better tasting than Estoc tank, which I recently reviewed, and they were both using the same coils. Now, the coils are the EUC Coils, Eco Universal Coils, and the reason they're universal because Vaporesso sells this little sleeve that you can get for the coils, you stick the coil in there. It's compatible with other tanks that use Atlantis style coils. Unfortunately, I don't have one of the little sleeves to show you guys, but I did wanna mention it.
I love the no-spill system that they have on here, so if I wanna change out a coil, all I have to do is remove my tank and then twist off the base, and pull out the coil. That's it. I love that, I love it! I hate when I have to take apart the whole tank just to get to the coil and replace it. I think that's really annoying and really messy. The little EUC coils are also very affordable, I found them on VaporDNA for $7.99 for a 5-pack. Because of the way they have this design with the airflow at the top, I'm not experiencing any leaking issues. Airflow adjustment on here, it's a little bit tight, in my opinion, so it can be a little bit difficult to adjust. Sometimes, after I refill the tank with more e-liquid, I do get a little bit of spitback. However, that does go away after three or four hits. Honestly, when it comes to the tank, the drip tip, when you're chain vaping, it does get pretty hot, so let me try that.
So that's about as many hits as I can take before that drip tip starts getting uncomfortably hot.
The Tarot Nano mod, it's cool-looking, I like the look. It comes in different colors, which is awesome. It has tons and tons and tons of different functions, which I just showed you guys in the up close videos, so I'm not gonna mention that, but I'm really happy that they have that custom power curve. That is amazing to see in something this little, so very cool, very cool. The little USB port, it's on the side of the mod, I love that. I hate when they put it on the bottom. So the USB port is not only for charging, the mod is also firmware-upgradable, so for firmware upgrades, you just go to the Vaporesso website, which I will have a link to down below the video, and they will have a download link for firmware upgrades.
It has Smart Wattage Recognitions, which is great for people new to vaping, because you might not know what all the other functions do, or you just might not wanna try them quite yet until you get a little bit more familiar. So with this, you don't have to worry about it, just stick an atty on there, and the mod does everything else for you. It'll only hold attys up to 23 mm. If you stick anything bigger on there, like 24 mm, it doesn't look that bad, but there's a slight, itty-bitty little overhang, and anything bigger than that will just look awkward. I really don't have anything else bad to say about the mod. So I nominate this mod as the Best Tiny Mod of 2016. If you're interested in picking up one of these adorable little box mods, the cheapest I found them was smokestore.us for $49.90, but feel free to Google it.
Alrighty guys, so that's it, that's it, that completes my review. If you wanna find me elsewhere, I'm also on Facebook, Twitter and Instagram. Alrighty guys, I'll talk to you later. Bye.